
FAQ | Approve KYM | How to verify Aadhaar ?
Login on AMPI website is essential for Pre-Approval or Approval of KYM data. Also you will need requisite permissions/rights for the approval activities.
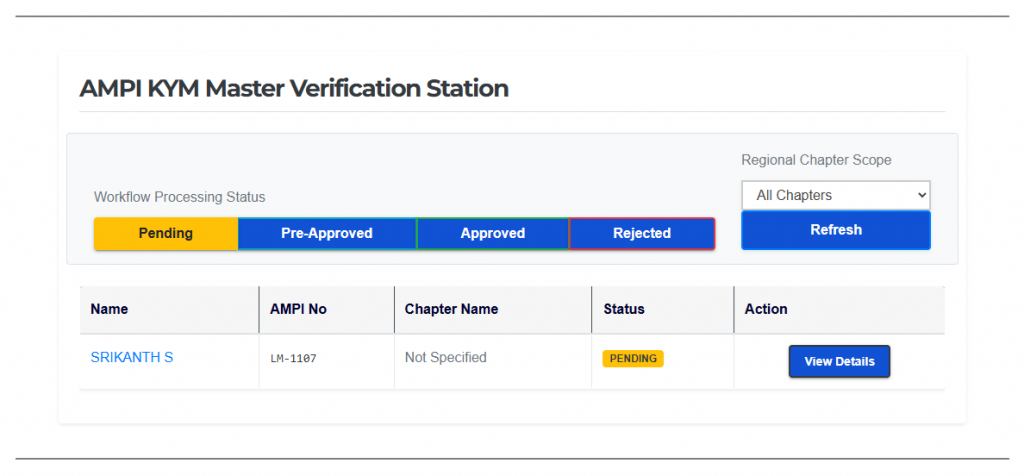
You will be greeted with the above dashboard showing list of submitted KYM Updates. You can view the list based on the KYM Update status like Pending, Pre-Approved, Approved, Rejected by clicking the respective buttons. Similarly you can filter the list based on the AMPI Chapter that you want to review.
As a pre-approver, you will have access to your chapter members’ KYM data only. Approvers will have access to all the Chapters. You can choose the chapter you want to review by selecting from the list of Regional Chapter scope.
To view the KYM data, click on the Name or the View Details button. You will see an overlay form displaying the member details. To close this form click anywhere outside or on ‘Close File’ button.
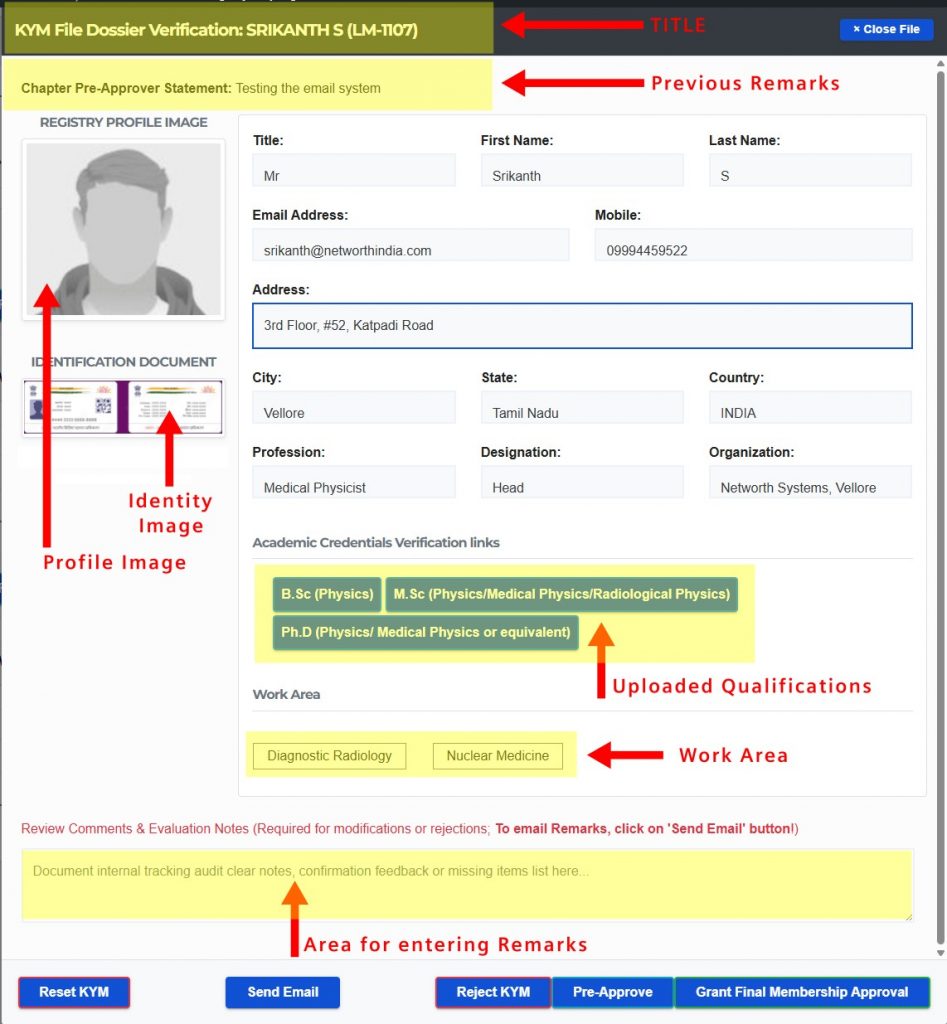
You can view the images better by clicking on them. For viewing the uploaded qualification certificate copies, click on the buttons displaying qualification names.
In case of indian members, verify the Aadhaar data (How to verify Aadhaar ?)
Once you have verified the veracity of the data, you can pre-approve or approve or reject. Remarks is mandatory for rejection of the KYM data. After pre-approve or approve or reject action, the remarks will be displayed at top of the window i.e. below the title.
User will not able to update the KYM Update form with the status ‘Pre-Approved’ or ‘Approved’. User can update the KYM Update form while the status is ‘Pending’ or ‘Rejected’.
You can use ‘Reset KYM’ button to reset the status, clear remarks, and pre-approve/approve activities in cases where member want to update his KYM data.
You can send an email to the KYM member by entering your message or remarks and click on the ‘Send Email’ button.
After completing the activity, webpage will return to AMPI KYM dashboard.
Frequently Asked Questions
- After pre-approval/approval/reject activity, I could not find the member listed.
- Member will be listed as per current status after update. For example, if you have approved the member then it can be seen under the ‘Approved’ group.
- I am not able to see all the chapters in the chapter selection list.
- Chapter List will show only the chapters for which you have access rights.
- I am not able to see the remarks.
- You may have done pre-approve or approve without any remarks
- Previous remarks are overwritten by the remarks submitted by the latest pre-approval/approval/rejection activity.
- Remarks submitted during last update action is shown just below the title.
- How to verify Aadhaar data ?
- Download the App: Install the official mAadhaar App via the Google Play Store or Apple App Store.
- Launch the Scanner: Open the app and select the QR Code Scanner feature. No profile login is required to scan other people’s cards.
- Scan the Code: Point your phone camera at the Aadhaar QR code (if the image QR code is not clear, ask the member to upload a clear image.)
- Match the Results: If genuine, the app immediately displays the holder’s Full Name, Gender, Date of Birth, Address, and Photograph fetched securely from the backend database. Match these against the physical individual standing before you